写在开始
此系列将以我独立开发的一个 SpringBoot 项目为基础,跟随我的开发过程,记录我在开发过程中的步骤及问题
项目地址 https://github.com/BeiyanLuansheng/OES
官方手册 Spring Guides
官方Demo Spring Projects
项目初始
创建名为OES的空maven工程,新建四个子模块,使项目目录结构如下(子模块以oes-start为例)
1
2
3
4
5
6
7
8
9
10
11
12
13
14
- OES
   ├── oes-biz [系统功能实现]
   ├── oes-common [通用工具类]
   ├── oes-start [启动类及网关]
   |     ├── src [源文件]
   |     |    ├── main [工程主文件]
   |     |    |    ├── java [代码]
   |     |    |    |    └── org.oes.start
   |     |    |    |         └── Application.java [启动类]
   |     |    |    └── resources [资源文件]
   |     |    └── test [测试文件]
   |     ├── target [编译文件, IDE运行时自动创建]
   |     └── pom.xml
   └── pom.xml
此时 OES 的 pom.xml 文件如下
1
2
3
4
5
6
7
8
9
10
11
12
13
14
15
16
17
18
19
20
21
22
<?xml version="1.0" encoding="UTF-8"?>
<project xmlns="http://maven.apache.org/POM/4.0.0"
         xmlns:xsi="http://www.w3.org/2001/XMLSchema-instance"
         xsi:schemaLocation="http://maven.apache.org/POM/4.0.0 http://maven.apache.org/xsd/maven-4.0.0.xsd">
    <modelVersion>4.0.0</modelVersion>

    <groupId>org</groupId>
    <artifactId>OES</artifactId>
    <packaging>pom</packaging>
    <version>1.0.0-SNAPSHOT</version>

    <modules>
        <module>oes-biz</module>
        <module>oes-common</module>
        <module>oes-start</module>
    </modules>

    <properties>
        <maven.compiler.source>11</maven.compiler.source>
        <maven.compiler.target>11</maven.compiler.target>
    </properties>
</project>
SpringBoot 项目
在 OES 的 pom.xml 文件中继承 SpringBoot
1
2
3
4
5
6
    <parent>
        <groupId>org.springframework.boot</groupId>
        <artifactId>spring-boot-starter-parent</artifactId>
        <version>2.5.7</version>
        <relativePath/> <!-- lookup parent from repository -->
    </parent>
你可以凭借缩进来判断加在了哪一个标签下
再添加maven打包插件
1
2
3
4
5
6
7
8
    <build>
        <plugins>
            <plugin>
                <groupId>org.springframework.boot</groupId>
                <artifactId>spring-boot-maven-plugin</artifactId>
            </plugin>
        </plugins>
    </build>
在 oes-start 下的 pom.xml 中添加以下内容,以使用 SpringBoot 的基础功能
1
2
3
4
5
6
7
8
9
10
    <dependencies>
        <dependency>
            <groupId>org.springframework.boot</groupId>
            <artifactId>spring-boot-starter-actuator</artifactId>
        </dependency>
        <dependency>
            <groupId>org.springframework.boot</groupId>
            <artifactId>spring-boot-starter-web</artifactId>
        </dependency>
    </dependencies>
添加配置
在 resources 目录下新建配置文件 application.yml
application.yml 和 application.properties 可以二选一,效果等同,不过 YML 是树形结构,更直观 如果两各文件同时存在,先加载 YML,后加载的 application.properties 会覆盖 YML 中的配置
1
2
3
4
5
6
7
8
9
10
server:
  port: 8089    # tomcat端口号
  servlet:
    context-path: /     # 根路径
    encoding:    # 编码集设置
      force: true
      charset: UTF-8
      enabled: true
  tomcat:
    uri-encoding: UTF-8
启动
在 Application.java 中写
1
2
3
4
5
6
7
8
9
10
11
12
import org.springframework.boot.SpringApplication;
import org.springframework.boot.autoconfigure.SpringBootApplication;
import org.springframework.context.annotation.ComponentScan;

@ComponentScan("org.oes")
@SpringBootApplication
public class Application {

    public static void main(String[] args) {
        SpringApplication.run(Application.class, args);
    }
}
注意 @SpringBootApplication 注解仅会扫描当前包(即org.oes.start)下的所有 @Service 等注解
为保证你写在 oes-biz 模块中的 @Service 或 @Component 也能被扫描到,需要手动添加注解 @ComponentScan,后面写上你要扫描的包路径,如果需要扫描多个包,写成 @ComponentScan({"cn.a.b", "com.c.d"}) 的形式
之后你可以在 oes-start 模块中写一个简单的 Controller,如
1
2
3
4
5
6
7
8
9
10
11
12
13
package org.oes.start.controller;
import org.springframework.web.bind.annotation.GetMapping;
import org.springframework.web.bind.annotation.RestController;
@RestController
public class MainController {
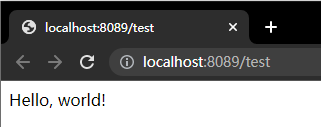
@GetMapping("/test")
public String getStr() {
return "Hello, World";
}
}
然后启动项目,访问在 application.yml 中配置好的端口号,如 http://localhost:8089/test