以QQ邮箱为例
在qq邮箱中打开 POP3/SMTP 服务(设置->账户->POP3/IMAP/SMTP/Exchange/CardDAV/CalDAV服务),会自动生成一个密钥,记下来,后面会用到
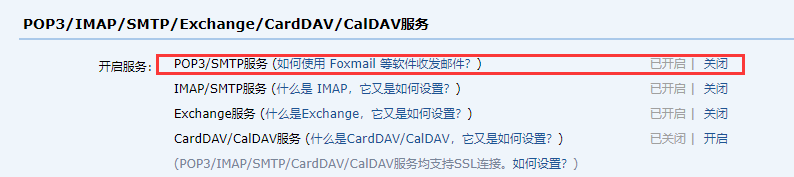
如果你以前在非QQ邮箱APP上登陆过 qq 邮箱,应该对这一步不陌生
添加依赖
1
2
3
4
        <dependency>
            <groupId>org.springframework.boot</groupId>
            <artifactId>spring-boot-starter-mail</artifactId>
        </dependency>
发送邮件
配置
1
2
3
4
5
6
7
spring:
  # 邮件设置
  mail:
    host: smtp.qq.com
    username: 941197279@qq.com
    password: abcdefghigklmnop
    default-encoding: utf-8
此处的password 就是开始提到的生成的密钥
接口
1
2
3
4
5
6
7
8
9
10
11
public interface MailService {

    /**
     * 发送简单文本邮件
     *
     * @param mailTo 邮件地址
     * @param subject 邮件主题
     * @param text 邮件内容
     */
    void sendSimpleMail(String mailTo, String subject, String text);
}
接口实现
1
2
3
4
5
6
7
8
9
10
11
12
13
14
15
16
17
18
19
20
21
22
23
24
25
26
27
28
29
30
31
package org.oes.biz.service.impl;

import org.oes.biz.service.MailService;
import org.oes.common.config.BizConfigurations;
import org.slf4j.Logger;
import org.slf4j.LoggerFactory;
import org.springframework.mail.SimpleMailMessage;
import org.springframework.mail.javamail.JavaMailSender;
import org.springframework.stereotype.Service;

import javax.annotation.Resource;

@Service
public class MailServiceImpl implements MailService {

    private static final Logger logger = LoggerFactory.getLogger(MailService.class);

    @Resource
    private JavaMailSender mailSender;

    @Override
    public void sendSimpleMail(String mailTo, String subject, String text) {
        SimpleMailMessage message = new SimpleMailMessage();
        message.setFrom(BizConfigurations.mailFrom);
        message.setTo(mailTo);
        message.setSubject(subject);
        message.setText(text);
        mailSender.send(message);
        logger.info("邮件已经发送");
    }
}
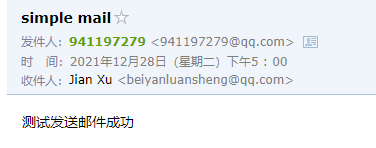
随便写一个 Controller 测试一下
邮箱验证
有了邮件服务,我们就可以写验证码服务了,基本思路是随机生成验证码->保存邮箱和验证码的对应关系->根据用户的输入验证
1
2
3
4
5
6
7
8
9
10
11
12
13
14
15
16
public interface VerificationService {
    /**
     * 给手邮箱发送验证码
     *
     * @param email 邮箱
     */
    int sendEmailVerificationCode(String email);

    /**
     * 验证手机号的验证码
     *
     * @param address 手机号或邮箱
     * @param code 验证码
     */
    void codeVerification(String address, String code);
}
1
2
3
4
5
6
7
8
9
10
11
12
13
14
15
16
17
18
19
20
21
22
23
24
25
26
27
28
29
30
31
32
33
34
35
36
37
38
39
40
41
42
43
44
45
46
47
48
49
50
51
52
53
54
55
56
57
58
59
60
61
62
63
64
65
66
67
68
import org.oes.biz.component.RedisClient;
import org.oes.biz.service.MailService;
import org.oes.biz.service.VerificationService;
import org.oes.common.exception.OesServiceException;
import org.oes.common.utils.RandomUtils;
import org.oes.common.utils.StringUtils;
import org.slf4j.Logger;
import org.slf4j.LoggerFactory;
import org.springframework.boot.convert.DurationUnit;
import org.springframework.stereotype.Service;
import javax.annotation.Resource;
import java.time.Duration;
import java.time.temporal.ChronoUnit;
import static org.oes.common.constans.OesConstant.VERIFICATION_PREFIX;
@Service
public class VerificationServiceImpl implements VerificationService {
private static final Logger logger = LoggerFactory.getLogger(VerificationServiceImpl.class);
/**
* 验证码有效时间 300 秒
*/
@DurationUnit(ChronoUnit.SECONDS)
private final Duration time = Duration.ofSeconds(300);
@Resource
private RedisClient redisClient;
@Resource
private MailService mailService;
@Override
public int sendEmailVerificationCode(String email) {
String key = VERIFICATION_PREFIX + email;
int code = randomCode();
redisClient.set(key, code + "", time.getSeconds());
// 发送邮箱验证码邮件
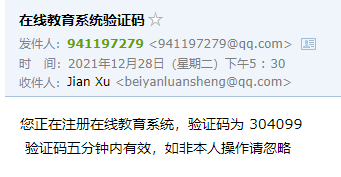
String subject = "在线教育系统验证码";
String text = "您正在注册在线教育系统,验证码为 " + code + "\n 验证码五分钟内有效,如非本人操作请忽略";
mailService.sendSimpleMail(email, subject, text);
logger.error("向" + email + "发送验证码" + code + "成功");
return code;
}
@Override
public void codeVerification(String address, String code) {
if (StringUtils.isBlank(code)) {
throw new OesServiceException("请输入验证码");
}
String key = VERIFICATION_PREFIX + address;
Object codeInRedis = redisClient.get(key);
if (codeInRedis == null) {
throw new OesServiceException("验证码已过期");
}
if (!StringUtils.isEquals(code, String.valueOf(codeInRedis))) {
throw new OesServiceException("验证码不正确");
}
}
/**
* 随机生成六位数验证码
*/
private int randomCode() {
return RandomUtils.randomInt(100000, 1000000);
}
}
然后再随便写一个 Controller 测试一下功能就大功告成啦